For my final (eleventh) ingredient, I selected ‘popping candy’. I researched and selected two recipes including Strawberry Popping Candy Chocolate Mousse/Glaze Cake” and Nostalgic Popping Candy Cupcakes. All recipes look brilliant however I chose Strawberry Popping Candy… because this recipe was by Heston Blumenthal who is a British chef who makes ‘quirky’ recipes. Heston infuses science and cooking together. From the beginning of this project, I wanted to make a Heston recipe so I could challenge myself. Since I was going to use strawberry flavoured popping candy, I decided to make two side desserts: Asian Jelly with Forest Fruits and Home-made Strawberry Ice Cream. I titled this combination of strawberry desserts: STRAWBERRY FANTASTIQUE! The word ‘fantastique’ is a French word which means “FANTASTIC” or “COMBINATION”. The ingredients for ‘Strawberry Fantastique’ are:
Home-Made Strawberry Ice Cream
Thickened Cream
Strawberry Essence
Egg Yolks
Sugar
Asian Jelly with Forest Fruits
Ajar Ajar Powder
Sugar
Water
Strawberries
Raspberries
Blueberries
Food Dye
Strawberry Popping Candy with Chocolate Mousse/Glaze Cake
Whole Hazelnuts
Milk Chocolate
Ground Ginger
Strawberry Flavoured Popping Candy
Thickened Cream
Salt
Water
Coffee Beans
Cocoa Powder
Sugar
This recipe was cooked over three days: day one was the ASIAN JELLY; day two was the CAKE and day three was the ICE CREAM.
Asian Jelly with Forest Fruits
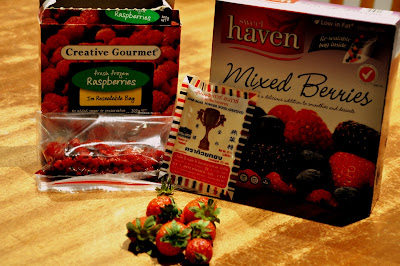
Asian Jelly is one of my favourite Asian desserts and I believe it’s better than ‘normal’ jelly because it sets quicker and it’s very versatile for example my mum uses coffee and cocoa powder as flavours and it still tastes great! It took approximately fifteen minutes to buy all of the ingredients in all recipes which was one of the fastest shopping times yet. I bought frozen mixed berries because it was cheaper and we were sticking to a schedule so I didn’t have time to buy fresh berries at the supermarket. My mum had already bought strawberries so I didn’t buy frozen ones. The frozen raspberries were leftovers from my chocolate pudding recipe earlier this year.
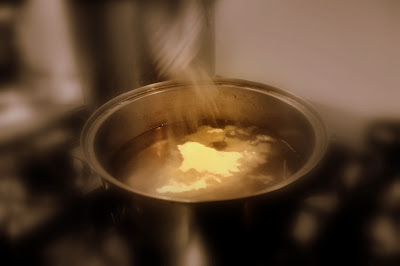
The first step was to put boiling water and the Ajar Ajar powder in a large saucepan. The powder is like gelatine on steroids, it sets really fast! Since my mum has cooked Asian jelly so many times, I asked her for the measurements of the water. She said to put in 2.1L of water (7 small bowls of water) in the saucepan. If you put very little water in, the jelly will set very quickly and if you put lots of water (on the packet, it said to put 3L), the jelly won’t set as quick. My mum doesn’t like following the recipe’s exact measurements because she doesn’t like eating very sweet recipes.
After the powder dissolved, I added one small bowl of sugar. The recipe said to put in two but it would be extremely sweet for mum so I listened to her. As the sugar dissolved, the mixture became very clear which meant it was ready for the next stage.
The next step was to start making jelly. I placed a small saucepan on low heat with 2½ ladle scoops of jelly mixture. I used two colour dyes; red and pink and used at least one drop from each colour dye. I then mixed it into the jelly mixture in the small saucepan.
In two plastic boxes, I placed various forest fruits into each box. Mostly, I put in strawberry because the blueberries were a bit sour and the raspberries were very mushy! Once I put in the right amount, I poured in the jelly mixture. The colour of the jelly blended perfectly with the fruits. I couldn’t wait for the jelly to be finished. Once I finished one layer, I repeated the ‘making jelly’ step, alternating pink and red as colours. I realized that the forest fruits in the frozen packets left a really sweet liquid which I decided to use instead of the food dye. The liquid was also red. I placed more fruits on each layer so the fruits were placed in different areas.
After finishing two boxes of jelly, the boxes looked so delicious! I had to put the two boxes in the fridge so the whole family could eat it fresh and cold. Although I had finished making the jelly, I had a lot of jelly mixture so I poured the whole mixture into a plastic box and waited for it to set. The non-forest fruit jelly took so long to set. It took around half an hour to set while the forest fruit jelly took only two minutes. Since the forest fruit jelly was in layers, it was quicker to set rather than dumping the whole mixture into a box in one go.
Day one: Mission accomplished but day two was the major part of the recipe: The popping candy chocolate mousse/glaze cake!
Strawberry Popping Candy with Chocolate Mousse/Glaze Cake
Pop Rocks is a candy which was created in the 1980s and was famous for its popping sensation when eaten. Since the urban legend ‘drink soft drink and eat popping candy at the same time and your stomach explodes’ came around, the candy eventually stopped production in USA and can only be found in lolly shops. I bought my Pop Rocks at a lolly shop in Melbourne which shows how much effort it takes to buy popping candy. The recipe said to use one hundred grams of popping candy so I bought 15 packets (seven grams each packet) at seventy-five cents each (twelve dollars altogether).
The first step was to make the popping candy base. To make the base, I had to blend the hazelnuts into a paste. It took a while for the hazelnuts to blend because the blades always got stuck for some reason. The hazelnuts smelt like Nutella which was a really nice scent.
After fifteen minutes, the hazelnuts turned into a lovely paste. I still wonder how hazelnuts turn from a dry nut to a smooth and watery paste. The scent turned from Nutella to a strong dark chocolate smell which was very unpleasant because I dislike eating dark chocolate.
The next step was to melt forty grams of milk chocolate using the bain-marie method. This method involves a large basin over a saucepan of simmering shallow water. I had to make the basin not touch the water or else the chocolate would burn. I found this method much easier than melting it by microwave because I’ve noticed that whenever I melt chocolate using the microwave method, the chocolate had a very distinctive burnt taste to it which I dislike. It takes a very long time for the chocolate to melt using the bain-marie method.
After I melted the chocolate, I added the ground ginger which had a really bad scent. According to Heston Blumenthal’s UK cooking show ‘Heston’s Feast’, the ginger is essential in the base because the ginger balances the flavours of the popping candy, the chocolate mousse and the chocolate glaze. Without the ginger, it’s going to be an oversweet dessert. In my opinion, it’s very odd to put ginger in a chocolate dessert but it’s Heston, he is weird with his recipes.
After mixing the repulsive ginger into the chocolate, it was time for the main ingredient, POPPING CANDY! I poured in the popping candy which made this cracking sound when it landed in the chocolate. I was surprised that there were only some red pop rocks while the rest were white!
After adding the popping candy, I had to mix it all together so the chocolate and ginger were spread evenly throughout the popping candy. The ginger made the whole mixture smell really funny but I hoped it would go away.
After mixing the mixture evenly, I placed in the hazelnut paste and mixed it evenly again. The hazelnut scent was really nice and it overthrew the ginger scent. YAY! For some reason, the paste looked like crunchy peanut butter but it didn’t smell like peanuts at all!
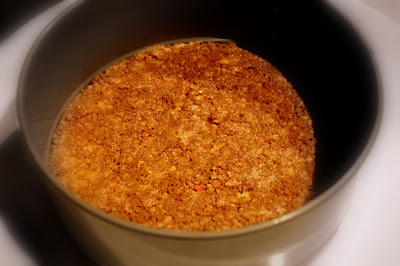
After mixing in the hazelnut paste, I placed a 17cm cake ring (the recipe used a 12cm ring but that was the smallest) on top of a serving plate and laid out the base mixture so it was flat and thin. I then placed the dish into the refrigerator for two hours so the base would be hard as rock.
The next task was to make the chocolate mousse. The first step was to chop three hundred and fifty grams of chocolate into small pieces. I didn’t understand why I had to cut them really small but I found out why later. I had to resist the temptation to eat the chocolate which was extremely hard!
After chopping the chocolate really small, I had to pour one hundred and fifty millilitres of thickened cream into a saucepan to boil. I actually put into two hundred millilitres of cream but I seemed it was fine.
Once the cream had boiled, I poured the cream into the bowl of chopped chocolate. I understood why I needed to chop the chocolate small so the hot cream could melt the chocolate. It didn’t take very long for the chocolate to start melting but I had to be sure that the chocolate didn’t have a granular texture. I remember I made chocolate mousse in Grade 5 with my sister and our chocolate kept having a granular texture which annoyed us and we hadn’t made it again ‘til now.
The chocolate mixture turned out to be lovely and smooth which shocked me because this was the only time the chocolate didn’t have a granular texture. I was so happy after mixing the chocolate.
I had to wait for the chocolate mixture to cool down to room temperature. While waiting, I began whipping the remaining cream for the next step. Before my mum bought a mixing machine, I had to whip the cream by hand which was so difficult but luckily this machine whips the cream in just minutes instead of hours.
After the machine whipped the cream, I had to fold the whipped cream into the chocolate. Luckily when the machine had finished whipping the cream, the chocolate had cooled down to room temperature. I have never used this technique before but my mum showed me how. I had to put one spoonful of cream in the middle of the mixture and start folding in the cream by putting the chocolate over the cream. It was that simple. This photo reminds of a whirlpool pulling the cream into oblivion.
After folding the cream into the chocolate mixture, the chocolate mousse looked so lovely and delicious! I tasted the mixture and it was absolutely amazing! I was so proud of myself that I managed to make chocolate mousse without having a granular texture!
When I finished folding the cream into the chocolate mixture, the base had already hardened. I took the dish out of the refrigerator and poured in the chocolate mousse mixture. The smell of ginger was gone and all I could smell was chocolate!
After pouring the mixture into the base, I tried to make the mixture flat but it had already hardened up so it was actually had an uneven surface. I placed the dish back into the fridge for the mousse to set.
After celebrating my success of making chocolate mousse, I began making the chocolate glaze. The first step was to chop twenty grams of chocolate into small pieces and then leave it aside. Since the air was hot, I placed the chocolate back into the fridge so it didn’t melt.
After chopping the chocolate, I had to place one hundred and twenty millilitres of water, eight coffee beans and a couple of pinches of salt into a pan. When I went shopping, buying the coffee beans was so funny because I asked the front counter at a coffee shop for 8 coffee beans and the person who was serving me looked at me very strangely and then laughed. I laughed as well. The person who was serving me gave me 10 beans and I paid thirty cents. My cousin accidentally put shreds of chocolate into the pan but I didn’t get angry because we were going to put the chocolate in anyway.
After putting the coffee beans, water and salt, I had to whisk the cocoa powder into the water and set over medium heat for it to simmer for three minutes or so. The strange thing about the cocoa was that even though it is in water, the cocoa looked very dry and not even wet at all.
I began to stir the cocoa so it could become a thick chocolate sauce and eventually it did. For some reason it reminded me of Aero because of the bubbles. The sauce actually looked like real melted chocolate!
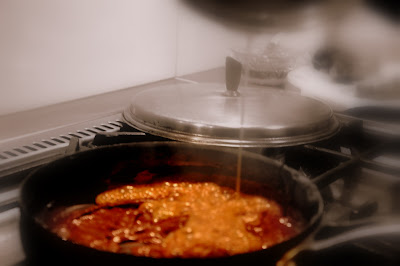
After making the thick sauce, I had to caramelise the sugar. Caramelising sugar has always been a difficult task for me but since I had a lot of sugar in the pantry, even if I did mess it up, I could redo it. The first step was to put the sugar into a small saucepan and set it over medium heat. After ten minutes, it began to start dissolving into a liquid. The sugar began to brown really quickly so it was ready within minutes. Caramelising the sugar was actually much easier now!
Before I could celebrate my success, I had to pour the caramelised sugar into the cocoa mixture. As I poured it in, the mixture began to bubble and spit but luckily it didn’t touch me. I then put the chopped chocolate into the mixture. As I mixed the mixture together, the mixture went from a light brown to a dark brown very quickly which made me think, “Is this dark chocolate?”
When the chopped chocolate had blended into the mixture and became a fine liquid, I grabbed the dish from the refrigerator and began to sieve the chocolate glaze to remove any sediment from the glaze. The colour of the glaze was a lovely dark brown which I adored. The taste of the glaze was really bitter because of the coffee beans but with the sweet chocolate mousse and base, it will even out the flavours.
The glaze looked amazing on the cake but before we could eat the cake, we had to refrigerate the cake overnight so it was nice and cold when eaten.
Day two: Accomplished but day three was a tough one. The home-made strawberry ice cream!
Home-Made Strawberry Ice Cream
The first step in making the strawberry ice cream was to pour sugar into a metal bowl.
The recipe originally said to put in one cup of sugar but since my mum said that is too sweet, I put ¾ of a cup of sugar. This photo reminded of a waterfall but this time it’s a sugarfall!
The next step was to put in 5 egg yolks. The process of separating the egg whites and the egg yolks was so tricky at first but once you separate two eggs, it’s really fun and easy. I didn’t throw away the egg whites; I used the egg whites to make an omelette for dinner so they were useful.
The next step was to add a quarter teaspoon of strawberry essence. The recipe was originally for vanilla ice cream and it told me to put in one teaspoon. The strawberry essence is a bit stronger that vanilla essence so I only put in a tiny amount (1/4 of a teaspoon). The smell from the strawberry essence smelt like fairy floss which was delightful!
Once I poured the strawberry essence in, I had to mix the mixture together with an electric mixer so it became a thick cream. When I began mixing the mixture, it was very crystal like and I thought it would never turn into a lovely thick liquid. The smell from the mixture was absolutely divine!
After a few minutes, the mixture was a very thick cream but the colour was a very strong pink which made me concerned about the sweetness of the mixture. I was very happy that the mixture became a smooth thick liquid.
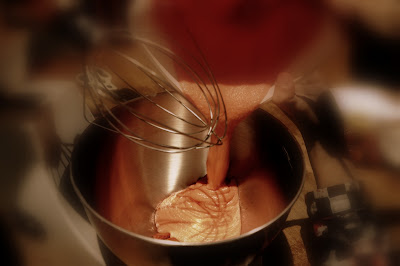
After the mixture was a thick cream, I had to put one hundred and twenty millilitres of thickened cream into the mixture and then mix it again ‘til all the cream was blended into the mixture. This photo reminds me if the way coffee is done at cafes when the barista pours the milk into the coffee.
The next step was to whip the remaining cream. Whipping the cream took around ten minutes which was really tiring because your hand hurts after whipping the cream around.
The next step was to fold the whipped cream into the strawberry mixture.
I then started layering the cream with the strawberry mixture. It slowly blended in with the mixture. After finishing one scoop of whipped cream, I just repeated ‘til there was no whipped cream left.
After folding the whipped cream into the mixture, I had to pour the mixture into a container to set for 6 hours. The container I chose was a used vanilla cream box which was big enough to fit the mixture. It was very frustrating and time-consuming when you don’t have an ice-cream machine but at least l know how to make it without an ice-cream machine.
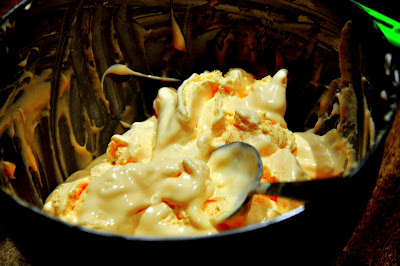
After six hours, this is what the mixture looked like. Once my mum saw this, she told me to put it in a different type of container after I’d mixed it. It looked hard and edible but it wasn’t time yet.
I decided to use the non-hand held electric mixer because it wouldn’t hurt my hands when I was mixing it. I decided to put real strawberry bits in it so there was some real strawberry in the ice-cream.
I poured the ice-cream mixture into the machine’s bowl and it was still very runny and it was as if I hadn’t put it in the freezer for six hours. I had to do this process three times so eventually it would become like ice-cream. It was very annoying to get the leftover ice cream from the container because sometimes the ice cream would get stuck in your hands.
After pouring the ice cream into the machine, I had to let the machine mix the ice cream for twenty minutes. Since my mum is very scared that the machine might break or burn because of how long it will be on for, she said to do a five minute interval (five minutes on – five minutes off, etc.) and the twenty minutes was up. I had to leave the machine on number two which was for normal mixing. I noticed that the strawberry bits were slowly breaking apart which was what I wanted.
After twenty minutes, the ice cream mixture turned from a very strong pink to a very light pink. It was strange but maybe the thickened cream blended even more after twenty minutes. I noticed that the mixture wasn’t as watery as before which was a good thing. I decided to use a bread making tray to hold my ice cream as my sister who previously made ice cream used this. I left the ice cream in the fridge for another three hours.
This is what the container looked like. This time when I was pouring the ice cream into the mixer, it was not very runny and started to harden which was excellent. No ice cream was stuck to the container this time which was great!
This time when the machine was mixing the ice cream, it was actually struggling to mix the ice cream around which was a sign that it was actually turning into ice cream. I used the five minute interval and when the twenty minutes were up, the ice cream was not runny and it didn’t leave any leftovers in the mixer’s bowl which I was relieved about. I put the container back into the freezer so it could turn into real ice cream for the next day.
The next morning I woke up and I immediately checked the ice cream. From the look of the on top of the ice cream, it looked ready and I was so excited to try it but I had to wait until presentation time.
After cooking three different recipes in three days, it was time for the presentation!
Presentation of Strawberry Fantastique!
That afternoon, I waited ‘til my cousin came home so he could take photos and when he arrived he knew it was time for presentation time. I grabbed all three recipes out of the fridge and placed them on the table. The recipes looked amazing and mouth-watering. The cake just looked scrumptious!
While I was admiring my recipes, I felt as if the cake was missing something on the top of the chocolate glaze so I tried to find anything that was yellow and sweet. After ten minutes, I found a peanut butter chocolate cup which has the perfect colour for the cake. I just sprinkled the peanut butter chocolate cup on top of the cake and it looked finished and perfect!
The next thing was to see if the ice cream was really ice cream. As I scooped out the some ice cream, it was perfect! The firmness was top-notch and the taste was intensely delicious but for some reason the strawberry bits were gone!
The next thing was to cut the jelly into pieces for presentation. Instead of using a normal knife, I used a zig-zag knife so it would cut the jelly into jagged pieces which made it interesting. Since there were lots of forest fruits in the jelly, it was very difficult to cut it in the box so I tipped it upside down and placed the jelly onto a plate. It was so much easier to cut the jelly.
My cousin did the ice cream presentation and I just adore this photo because the light shining above the ice cream reminds of god sending a praise of well-done!
After three days of cooking, I was more than satisfied with my end products. I decided to use the whole cake instead of cutting a slice because I loved the presentation of peanut butter sprinkles. I loved the ice cream’s presentation because it reminded me of how ice cream parlours would serve ice cream in that style. The jelly’s presentation wasn’t striking but since I cut most of the jelly badly, it was the best I could do. Once my cousin had taken fifty photos of the presentation, it was time to eat! Since my family wasn’t around, it was only my cousin, my cousin’s sister and I who could try it. We first tried the cake. As the recipe says, we used a large knife which had been sitting in boiling water for five minutes. If I didn’t do this, when I cut the cake, the sliced cake would shrink. I cut one piece and we all tried it. The mousse was divine and near perfect, the chocolate glaze was so beautiful with the mousse and the popping candy base was delicious and the popping candy made popping sounds whenever we took a bite. The only negative about the cake was that the ginger was a bit too strong and overthrew the strawberry taste from the popping candy. The ice cream was the bomb! It was delicious and I felt it was perfect! I found no faults but my cousins thought there was no strawberry flavour. I felt the jelly was pretty good but I felt the fruit overpowered the sweet jelly taste. Once my whole family came home, they tried everything. My mum loved the ice cream and said it was perfect, she disliked the cake because it was too sweet and she disliked like jelly because it was sour. My dad loved everything and couldn’t find any faults and my sister loved the cake, ice cream and jelly as well. Overall, I was glad that I finished my last recipe with a bang! It’s sad that it is the end but I could make it again. This is so far one of my favourite recipes!
Heston’s ‘Popping Candy Chocolate Mousse/Glaze’ Cake was taken from food blog CHUBBY HUBBY
Home-made Strawberry Ice Cream was taken from my primary school’s food teacher
Asian Jelly with Forest Fruit was taken from my mum’s knowledge
Q: Have you ever tried popping candy? If so, did you like it?
Please your answers in the comment section below.


